Showing posts with label Cave troll. Show all posts

Tuesday, June 30, 2020

Rescue Hedger! Shire Protectors Battle Company Battle Report

Well, Hedger was injured and left at camp with Geleth and Monty while the others headed off shopping and stuff. And wouldn't you know it, along comes Mur'Baj's battle company - and they have a cave troll!

In this mission I start with three guys in the middle of the map, with the enemy battle company close by and the rest of the team only coming on from the far edge. If I can reduce the incoming goblins to 50% I win, if they knock out Hedger, they win!

And we're off to a good start! Geleth shoots one of the goblin archers!


And the rest of the team hussles in (at slow speed for the dwarves and even slower speed for the hobbits!) In round 2 Geleth uses one of his sneaky elvish songs to compel the leader of the company out onto the rickety bridge, and Hedger then makes a great shot to take him out! Cookie races ahead on his pony!


Monty the dwarf holds fast behind the ancient doors, while goblins attack!


Geleth sings another verse to his song and makes the cave troll run in the wrong direction, meanwhile Hedger is only a short way in front of a conga-line of goblin troops!


Cookie manages to hold off a goblin blackshield, Monty similarly repels two goblin attackers.


From above you can see that the magpie is lending some assistance here (allowing Monty to get a re-roll).


Hedger's new ability to move as well as shoot means that the following horde is being whittled down, but he's not out of the woods yet - literally or figuratively!


Cookie and Loki take out the blackshield, Monty continues to hold off the other two goblins.


Hedger is now at the rivers edge and will have to leap to the central island, the troll and remaining goblins are closing in!


With both Loki, Skodi and Cookie taking on goblins, another falls! It's getting close to 50% of the goblin force...


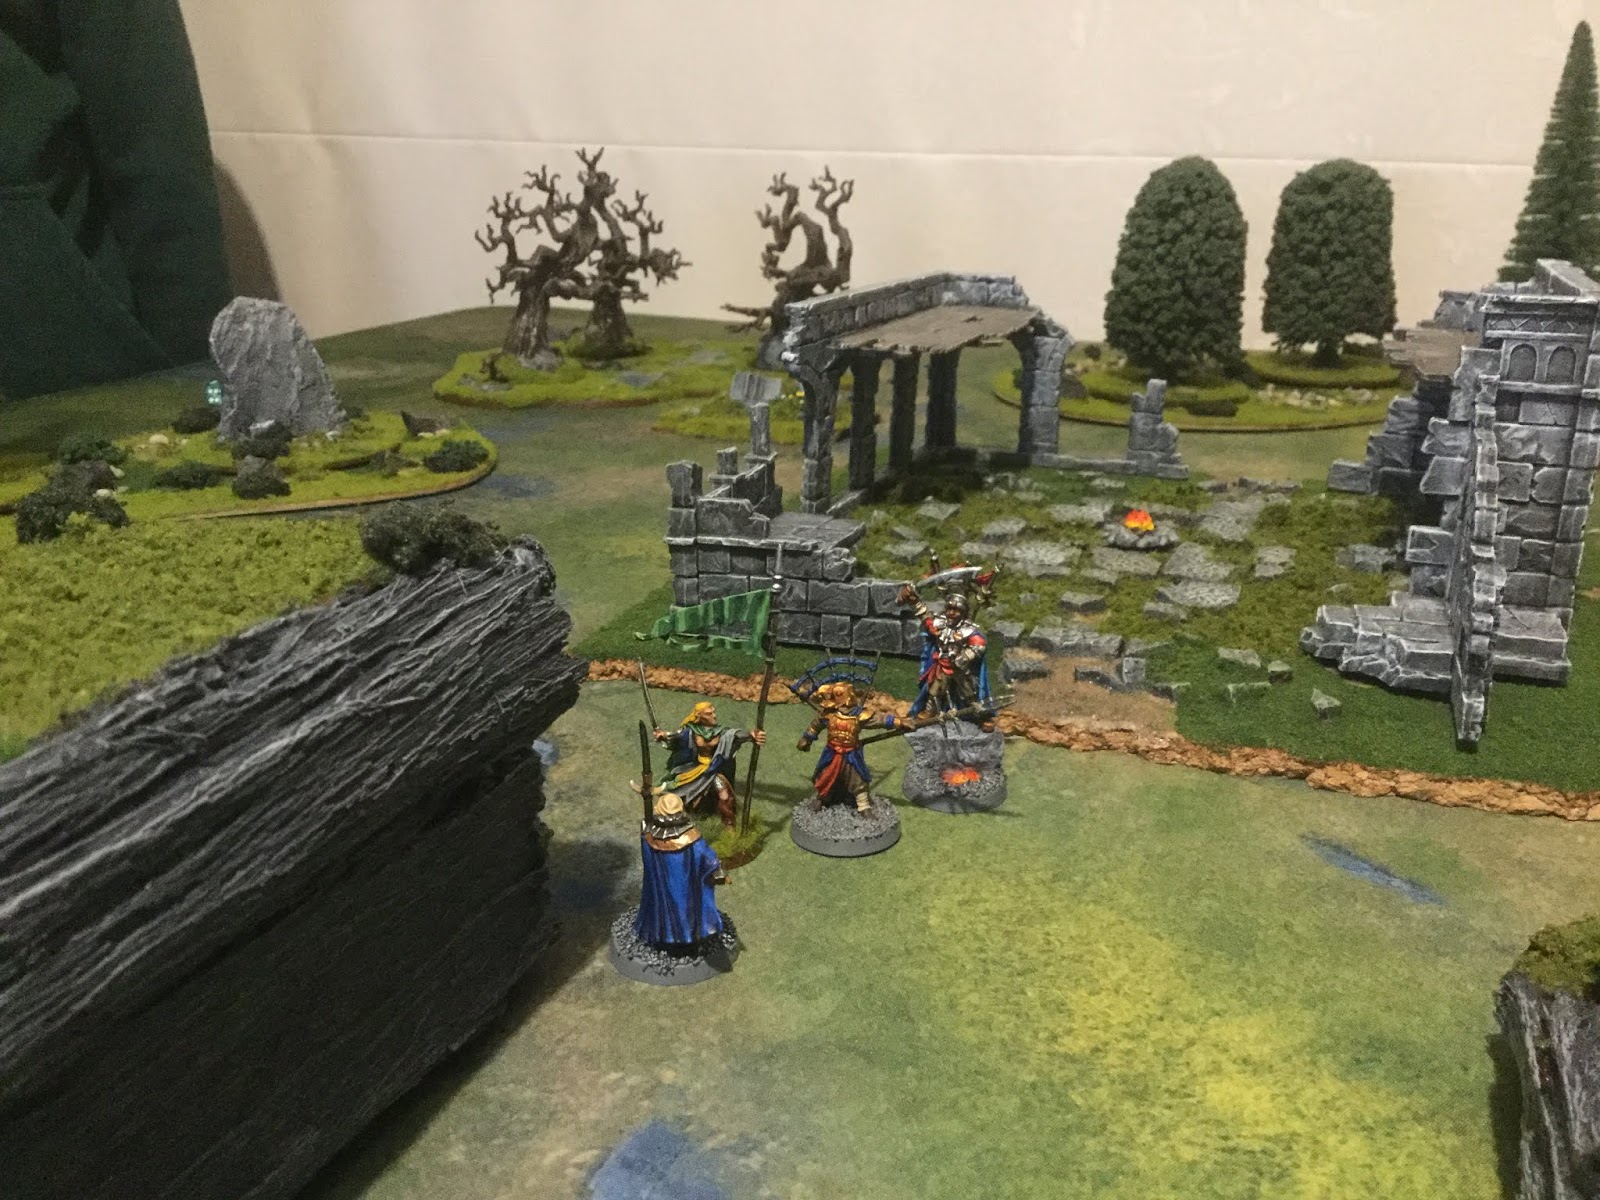
And Hedger has successfully made the leap to the little central island. The hobbits all throw stones and shoot arrows at the goblins, but fail to knock any of them out.


And on the next turn, the dwarves and cookie get the final kill required and secure the numbers necessary for a win!


But in a totally bizarre twist, two goblins leap over to the small island and beat Hedger's duelling rolls and then get a wound past his fate as well! Hedger falls! It's a tie!!!


At the end of the match Hedger receives a permanent leg wound, which slows him down to dwarf speed. A new dwarf, Archie the ranger, joins the company and Cookie again gets the mini of the match! 


Two of the three goblin heroes as well as the blackshield will be missing their next mission, but they're joined by another goblin blackshield to help pick up the slack.

Tuesday, June 2, 2020

Shire Protectors Battle Company Battle Report 3 - They have a cave troll!

Well, Loki was captured by some goblins... and it turns out they have a Cave Troll! Yikes! These beasties can really ruin your day, with three attacks and a higher fight value than any of my crew, if they get into close combat and roll a 6... well... let's just say that there may be hobbit bodies here, there, and everywhere!

Some of the pictures didn't turn out so well, so excuse the slight gaps in the story! Loki is being held prisoner, he counts as unarmed and as long as three goblins stay around him he can't go anywhere. Meanwhile, the cave troll charges towards my squad. Arrows fly from Hedger, Tom, Harry and Geleth, they hit, but bounce off the tough troll skin!


The troll continues to charge down the hill, with arrows and rocks just ricocheting off the beast! Just before the troll charges, Tom's arrow manages to pierce the cave troll! And then a stone flung from Farmer Maddock also hits the troll in a very sensitive spot - it's down to one wound as it charges into the hobbits! I surround it with everyone and gulp as my son rolls the dice... a 1... a 1... and... a... 4! I have a chance, I just have to get a 5 with any of my eight guys. I roll a 2... a 4... a 3... a 1... a 3... a 2... a 4... another 4... and then... finally... a 5! Phew, that was almost a total disaster! Now I just need to roll a six! I get it first try with Hedger! Down goes the cave troll! Very anti-climactic, we were expecting to lose a few hobbits before the cave troll was defeated.


Now onto the remaining goblins. Three snipers are up in the ruins, with a smattering of other goblins. We race forward, arrows flying from both sides, but no damage is done.


Closer and closer we get, some arrows hit, but nothing manages to wound.


Finally Harry takes out one of the goblin archers. The other two archers hit hobbits, but can't manage to do any damage!


Tom and Harry take out the other two archers in a dazzling display of Hobbit archery! We are now super close to rescuing Loki!


Skodi takes out a goblin, and so does Cookie, CLANG goes the frying pan! Meanwhile, Farmer Maddock takes out a goblin wielding a spear!


It's all stacks on to the goblins near Loki, most of whom run chittering away!


And off the little buggers go! Victory to the Shire Protectors! Loki, who was a rescuer of Jolly has himself been rescued in return!


And with enough influence to roll twice on the reinforcement charts we have three more hobbits join up, Fatty Cooper, Marmadoc (M.C. Hammer) and Andwise (Andy) the Shirrif. Loki has also been promoted to an Iron Guard! So now I have four proper fighters (a ranger, two dwarves and an elf) and ten hobbits!


My son has been very patient as we wanted to level up my company to be roughly equal to his so we can do a teamed up mission. However, after three missions and mostly hobbit reinforcements, his Elven battle company still way outclasses mine - hobbits don't count for much! In any case, we're still going to do a cooperative mission next time, I'm sure he won't mind having better guys than me =)

Sunday, September 15, 2019

Far Harad Battle Company vs Goblins vs Troll

With lots of painting my Far Harad battle company finally got member number 6 and was ready for the first mission against the pesky elves. Here they are charging into battle!


My melee guys charged in and I found out that spear support is really key against these elves with their pesky special rules =)


My two blowpipe guys hid behind very heavy cover and spat poison darts out at the elves.


It was actually a pretty short battle as the spears and blowpipes seemed to be rolling really well and i only suffered one casualty.


Next up we ran a goblin battle company... from 6 troops to 12 for the goblins! This was (again) helped a lot by some spear support, giving me a lot more dice to roll.


The goblins swarmed down and over the elves, with only three casualties.


And it was a lazy Saturday so we then played Far Harad vs. Goblins vs. Cave Troll + wargs (normally cave troll and goblins, but it would be too hard to tell them apart!)


While the wargs were dealt with, both battle companies advanced (the goblins were quicker as they completely dominated the wargs with 6v1 battles happening!


In the end it was a total mess, with everybody stacking up against the troll and against each other! Four goblins were slain, two Far Harad were slain and the troll took two wounds from the mahud first, then a goblin got the last hit in!


At the end of the two matches the Far Harad team expanded by two members and mounted the main hero on a war camel!


The goblins saved up all of their influence (including the lucky roll bonus from the first narrative mission) and convinced the cave troll they just beat to join their party! 12 goblins and a cave troll make for a pretty awesome Battle Company!


Monday, September 9, 2019

Battle company Shire vs Dwarves vs Troll

Next on our list was the dreaded Cave Troll mission which, last time, saw most of my Harad battle company destroyed. 

Again, I got the idea for the slightly harder difficulty from the awesome guys in Ontario: OSGBL Cave Troll

I didn't take many photos, but at one point it looked like this:


And from the other side...


The hobbits lost a single model to a thrown boulder from the cave troll, meanwhile, they stood their distance and killed the troll with arrows and stones! Yes, the piddly little strength 1 stones. My son was in charge of the hobbits and he thought the troll was too scary to attack directly, so he just threw stone after stone!


Meanwhile, my dwarves took forever to break through the goblins, Brynmor was a casualty and although I killed the goblin captain and more than half of the goblins, it took me so long that the troll was dead before I even got to it! 


So not sure how it happened, but the Hobbits took the win! Four archers and ten stone-throwers a turn really adds up with a 3+ to hit. I guess with stones it was 3+ to hit, then a 6 followed by a 4+ to wound which is... I think... 1 in 18 chance to wound? And the archers 3+ then a 6, so 1 in 9 chance to wound. With three points of might among his troops to tip a few 5s into 6s. And given it took me five or six rounds to run up and kill the goblins that probably makes sense. Don't underestimate large numbers of hobbits with lots of stones!

Another good fun game with a very happy little boy bragging about killing a cave troll with a thrown stone!

Fortunately in the post game there were no permanent wounds taken, so all in all it was easy xp and influence =)

Friday, August 30, 2019

Harad Battle Company

My son is now 8 year old, can you believe it?!

As such he can play now though we have to limit our opportunities given the general busy lives we lead.

He's also not super patient and very scared of losing guys in battle so we've adjusted how we play slightly.

I no longer take notes or many pictures and his heroes can't die (they can be injured and if they roll the death roll we just play the rescue mission rather than have them actually die).

Anyway, I did take a couple pictures still.

The first mission was out of White Dwarf and involved my Harad battle company taking on five Mirkwood Rangers. Oh... my... goodness! That stupid knife fighter rule, coupled with their excellent archery meant that this was a really close game. This picture shows the elf who single handedly ended up killing 6 of my Haradrim!!!


The next mission was my Harad company against my son's dwarves and a cave troll!
Like on the very excellent OSBGL channel, which I super highly recommend: OSBGL Battle Company vs Troll we added some goblins to the mix to make it more of a challenge.

I charged right in, expecting lots of spear support to help carry the battle my way. I took out five goblins! Unfortunately, the cave troll just kept rolling at least one six in the fight to roll off and took out five of my Haradrim - including my leader!


I'll take a better shot at some stage, but my son is currently reading The Fellowship of the Ring and has read The Hobbit, so we made him a battle company of Dwarf Rangers coloured in the ways that they're told in the book - quite bright colours some of them! 

Anyway, he stood back and used throwing axes, dwarven longbows and one hobbit stone every turn and eventually he took down the troll that way! He was so very, very excited, it was really awesome, we had high-fives and he ran screaming out to tell my wife every time he scored a wound on the troll - very cute!


Post game he expanded his company further and I upgraded two leaders to ride - one on horse, one on raptor =) Balin was a casualty hit by a troll-thrown stone, but he fully recovered. My leader took an arm wound and two of my archers will be out for the next game!

Here the two companies are...


It's such a great, fun, quick game when you're not recording every move!

You may also spot some of the scenery I've put together, a couple of hills with rocky faces and a board with some ruined tiles on it to sit the osgiliath ruins on (they're not glued down, so can still be used elsewhere). Also some rough terrain templates with room for trees or rocks on them.

Anyway, that's it for now!

Wednesday, May 16, 2012

Trolls vs Haradrim - Evacuate

Well, what do you think happens when, all of a sudden, Buhrdur, two cave trolls and a whole host of goblins suddenly descend upon a Harad town? Read on to find out!

My brother and I have done a bit of a re-mix on an old battle report from a couple of years ago. It's essentially the "uprising" mission from the original Harad book. The guys in the town start off with 550 points, three heroes (one chieftain, two hasharii). The troll force has Buhrdur, two cave trolls and lots of goblins for a total of 450 points.

The scenario is for the Harad heroes to try and make it on board a boat handily anchored off shore. The troll force has to stop them. Every turn D3 goblins that have been slain can come back as reinforcements off a board edge chosen by whoever has priority.

Just to make it even more interesting, no warriors may begin within 8cm of one another. As you can see from our initial setup below, this makes for quite a messy game! A whole lot of fun messy game! The only exception to this rule is that the Harad heroes (who start at the far - northern - end) may have three bodyguards each.

Now I'm tired, I have an assignment due soon and want to get my loose ends tied up before I make a start on Diablo III, so this will be more of an annotated battle report rather than anything particularly prosaic, I hope you'll understand!


Starting board from the opposite corner...


In turn one, all of the archers on the rooftops shot at one another! For dramatic effect anybody dying near a building edge fell screaming to the ground below (of course). The harad warriors who had bows were given the warrior of karna upgrade, which made them hit on a 3+ rather than a 4+ and over the course of the game it made them really excellent archers! On the first turn of archery the goblins killed one Harad archer for four goblins killed in return.


It was fun having "streets" with alleys to shoot down. There were melees breaking out all over the place (as well as archers thudding down from above).


There were a few two-on-one fights in the first turn, though these were hard fought and went both ways.


In the ruins, one Harad spearman managed to hold off a few goblins for a couple of turns!


Starting so spread out it was quite chaotic, so different to the usual spear block formations and groups of archers.


At the end of turn 1 the goblins had lost 9 of their number for 5 Harad losses.


Turn 2 saw priority going to the goblins, three more goblins popped onto the battlefield as reinforcements. There was never a problem having some to be taken from the pile of dead =)


Sinbane the Hasharin was charged by a suicidal goblin who knew that he had to try and slow down the humans for the cave trolls. He paid for his bravery in green, sticky blood.


The spear-troll made short work of his first opponent, skewering him with a spear bigger than the man's body!


Another gratuitous alley shot. One lucky goblin =)


Buhrdur heads towards the middle of the board for the most options.


As you can see from the pictures, there were plenty of deaths on both sides.


Mr. Lucky here is still going!


The three goblin archer reinforcements fire and kill a watcher. Because the humans can outrun the goblins I tended to bring in archer reinforcements.


The chieftain and his entourage head towards the ruins.


At the end of Turn 2 the Haradrim have pretty much secured the rooftops, having slain most of the goblin archers up there. 


Turn 3 has priority with the goblins again, another three reinforcements come on. The spear-troll continues smashing his way towards the hasharin hero, brutally stabbing a watcher in a spray of blood and gore.


The haradrim archers are doing a good job of killing goblins, the 3+ roll to hit is doing well. There were 10 archers, and I think the upgrade is something like 2 points. You go from a 50% chance to hit to a 67% chance to hit, or from about 5 hits per turn to 6 or 7 per turn. 


This game was to last on the order of 10 turns (I won't spoil it yet by telling you how long it went for) so that's about 50 hits in the game expected from 10 archers unupgraded to about 67 hits when they're upgraded. Those extra 17 hits only need to kill 4 goblins to make it worthwhile and given that there's a 1 in 3 chance of killing a goblin with a bow, you'd expect to kill about 6. In other words, for this particular game the upgrade was worthwhile. 


Also it's nice psychologically to hit on a 3 =) (Actually, you have a slightly better chance of killing due to the poison arrows come to think of it - although you get them without the upgrade anyway.) And you don't get all of those kills because some of the archers die during the game. 


Anyway, there's lots of people saying it's wasted points, but you can get your money for it in some games. We really used it to bulk up the army as my brother didn't have enough models to make the points up for this scenario.


The watchers bodyguarding the second hasharin throw themselves forward into combat, letting the black-clad man dash forwards towards the boat.


The haradrim man in the ruins backs to the doorway to try and even the odds against the goblins. Guarding a doorway like this makes the goblins roll to see if they actually strike the man or the wall, so it was much safer for the human!


At the end of turn 3 the goblins seem to be doing a good job of keeping the humans well back from the boats, delaying them to let the trolls get down the board.


In turn 4 the spear-troll again slays a human as he heads towards his target hasharin.


Buhrdur is getting closer and closer to the chieftain, who would duck through the ruins - except for the spearman guarding the doorway against the two goblins! A bad bottleneck when there's a big troll heading your way.


Since goblins can climb right up walls, a few times I spooked my brother by suddenly joining his archers with goblins. Of course, these times usually ended in plummeting goblins rather than dying haradrim! The hammer troll is slowly but surely working his way down towards the ruins, smashing humans in his path.


You can see a goblin near center that has fallen to his death after being beaten by the harad bowman he had tried to surprise. It is compulsory in these situations to actually make a falling, "aaaaaaahhhhhh - splat" sound when playing. 


Here are two of the Harad snipers. These guys killed lots of goblins, sometimes very strategically. With plenty of range they had a lot of targets to choose from!


A couple of spearmen peel off to block Buhrdur while the harad spearman desperately tries to kill the goblins that are now blocking the chieftain's path to the boat!


Detouring around the ruins, the hasharin is charged by a goblin... who wins the fight... and wounds the hasharin! The hasharin then fails all of his fate rolls and is wounded! This is the luckiest goblin ever. We think the hasharin was so surprised at being attacked by a lone goblin that he let his guard down.


The other hasharin is getting mighty close to being face to belly button with a very angry troll. He kills his third goblin as he heads for the ladder. We decided trolls couldn't climb ladders.


At the end of turn 3 our turns are already quicker to resolve than the photography.


In turn 4 the spear troll is charged by a few haradrim, only one of them (a watcher of karna with their bonus against terror) manages to actually contact. He regrets his bravery shortly thereafter, but has given the hasharin a chance to escape!


Which he does by climbing up the ladder onto a rooftop just in time to see a goblin interloper slain by the bowmen. ("aaaaaah - splat!")


Similarly Buhrdur is charged... and loses his combat?!? At least the goblins are still bottlenecking the ruins.


Here is the terrifying Buhrdur, beaten by a spearman!


And wouldn't you know it?! The spear-goblin is finally defeated, with a good priority roll the ruins will be open for the chieftain!


Here are some sneaky goblins about to climb the wall and interrupt those pesky snipers.


This goblin archer killed a few guys, shooting every turn throughout the whole game. Unfortunately one or two of the kills were goblins... oops - sorry fellas!


The hasharin charges up the board, fired at by a LOT of arrows. With no fate and only one wound left he's not likely to make it too far. This particular turn he was hit about five times but no wound! He must have swiped all the arrows out of the air with his lightning fast knives! Inconceivable!


This goblin and this watcher fought each other for turn after turn. Although the hasharin had long moved on they continued at it, neither one managing to kill the other! It's little sequences like this going on in a game that make it really fun. Every turn it was like "he won the fight... no wound!" "no way!" So much fun =)


The spear-troll keeps pace with the hasharin by moving around the base of the building. Three goblin archer reinforcements step on as the hammer-troll also heads towards the human hero, who is nicely and dramatically silhouetted in this shot.


The other hasharin engages one of the shooting goblins, six arrows flash towards him... and land thwack into the goblin. Although fate wasn't with the hasharin before, he's somehow survived two rounds of arrows now - and one friendly fire goblin death! Inconceivable!


Buhrdur creams his way through another valiant spearman attempt to keep him at bay, while the final goblin falls in the ruins. In hindsight I should have used a heroic combat with Buhrdur, but didn't think about it until we had already done a few combats and you really should do it at the start of the phase. My brother and I are super lenient about such things, but I chose not to do it so that maybe the annoyance of forgetting would make me less likely to forget some other time.


The chieftain claims another goblin skull for his collection (which he keeps next to his wife's teacup collection).


At the end of turn 4...


In turn 5 the two haradrim that were shadowing the cave troll charge, one is too terrified to attack, but the other manages to hold the massive beast in combat. 


The brave, possibly stupid, move has allowed the hasharin to descend the ladder unharmed, although the hammer-troll now looms large before him. Goblin arrows flash through the air, but clatter harmlessly against the brickwork behind him.


Around the back of the building, two familiar foes continue their ballet of brutality.


Goblins continue trying to climb the buildings to stop the archers from doing their thing. Most of the time it results in a dead goblin, but it was a dead goblin *I* chose rather than a goblin down near one of the heroes, so I consider them worthy sacrifices.


Case in point, two harad archers take out two goblin archers that had a clear shot at Mr. One Wound.


Who continues sprinting towards the boat, arrows flashing around him. Oh, and there may have been another friendly fire incident... maybe... how lucky can one guy be?!?! Inconceivable! 


The haradrim chieftain finally enters the ruins, Buhrdur right behind him remembered this time to call a heroic combat, slays a spearman, then charges into the bodyguard and slays him too. Now he is posed for a clear attack at the chieftain!


At the end of the turn, it's not looking too brilliant for this hasharin either...


One hasharin has one wound and no fate, the other has two cave trolls near him and the chieftain has Buhrdur breathing down his back...


Turn 6 sees one epic confrontation finally finish! 


The two-trolled hasharin calls a heroic move, gets his companions to attack the troll, then runs around them! The haradrim archers start taking out the goblin archers.


More epic haradrim archery sees goblins who could have charged the other hasharin fall dead as the human continues on his epic run...


Here's another angle on it, fortunately I've got goblins up on the buildings trying to stop the harad archers from sniping. Unfortunately they're not doing a very good job =) And yes, it's a smiley face because I find it quite fun to play with goblins, you don't expect much from them so it's a bonus if something does work and funny when it doesn't!


Both Buhrdur AND the chieftain called a heroic move... the chieftain won the roll-off so managed to elude the massive troll, who charged his bodyguards... lost the combat... and was wounded!


At the end of turn 6 it's still anyone's game. The heroes are finally making some progress, but it will take a bit of luck to get past the trolls!


Turn 7. With some more fancy footwork and excellent courage rolls the trolls are kept pinned (as they slaughter the pinners - it was both frustrating to not be able to attack the hasharin, but gleeful to be smashing with the trolls). More haradrim archery fells goblin archers. 


Mr. One Wound continues to evade goblin arrows as he beelines towards the safety of the boat... Inconceivable!


From another angle you can see the goblins shooting at him. Every other game he's in he seems to die to arrows and he was almost dead right at the beginning of the game! He's living either a charmed life or he's on borrowed time... we were both eager to see which!


Poor Buhrdur, the evil cave troll chieftain who has slain hundreds of innocents, he takes another stabbing wound from a haradrim spearman. He's got no chance of catching the chieftain now (and is only one wound away from death!) At least he's got a good paintjob. (That's actually what I said to my brother.)


At the end of the turn it looks as though the two hasharin are on the home stretch!


Turn 8... uh oh... with no might left for another heroic move and priority going to the goblins, the hasharin is assailed by a hammer-troll backed up by a spear-troll. I always thought the spear was useless, but in this case he didn't have enough movement to reach base contact with the hasharin, but did have enough to get to base contact with the other troll! It's only one extra die, but it's a strength 6 one!


Mr. One Wound can be seen in the upper left of the shot. The haradrim archers take out the goblin archers.


Here's an angle showing some scale on just how big the trolls are compared to humans. The hasharin lost the fight, but only took one wound due to some lucky fate rolls! Still in the game!


Buhrdur again loses his fight! He still manages to stay alive though! Since when did my cave troll chieftain start thinking that way, from "how did I only manage to kill two humans this turn" to "phew, I didn't die!"


The chieftain is now close to getting a clear run to the ship, arrows whizz past him...


As you can see from this angle, I have goblin archers down every alleyway!


And Mr. One Wound Hasharin is almost there! Totally and utterly inconceivable!


At the end of turn 8 we're both cheering for the hasharin making his run to the boat! What a run the whole way with one wound left!


Unfortunately for the other hasharin, two cave trolls smash and stab him two times too many.


Oh, and from this angle you can see the assistance a goblin archer made to the combat.


The haradrim are still stopping me from shooting at the chieftain, throwing themselves into combat with all of my archers. Speaking of which... why do I keep reinforcing with archers when goblin archery is so stormtrooper like? Because humans are faster and outrun the little green stumpy legs, whereas my archers can come on and still participate in the battle.


Buhrdur loses ANOTHER combat, but stays alive =)


Archers keep on pegging shots at the rapidly diminishing back of the chieftain.


And Mr. One Wound Hasharin makes it to the ship! Huzzah! We were both really excited about this! What an inconceivable run to have made! I guess that word does not mean what I think it means!


If you look carefully by the beach you'll see a dead goblin archer. Since the humans had priority he was shot before he got to shoot. In a bizarre feat of "what if-ness" I wondered what would have happened if my brother had shot at something else. I rolled, and, you guessed it, that goblin archer would have killed Mr. One Wound! If I'd used that roll for one of my other archers I could have hit the chieftain!


Turn 10 and the hammer-troll is charged, but the spear-troll lunges out towards the chieftain, who is almost right at the boat!


Nooooooo! I mean... Yay! It's so hard to know who to root for sometimes! The chieftain, having made it SOOOO close is brutally and devastatingly destroyed, splashing blood and guts up onto the boat.


Which raises anchor and starts heading out to sea with a very relieved hasharin on board!


Just to finish the turn off, the hammer troll smacks a watcher to the ground...


Buhrdur finally wins a fight and decapitates two haradrim men...


And the boat sets sail for less goblin-infested shores. What an epically awesome match!


Technically speaking I won, as the scenario called for two heroes to escape for Harad victory and two heroes dead for Troll victory. I sort of think it was either a minor victory or a draw. My brother conceded a win to me. Either way we had a ton of fun!

Here are the surviving few humans.


And all that was left on the board for the trolls.


Well, what can I say, a complete blast of a game to play. That plucky hasharin run was just so amazingly fun. Every turn we would watch the goblin arrows plink around him. Every time he was hit we waited anxiously for the wounding roll. My brother threw everything at the goblins to stop them from shooting or shot to death goblins that were trying to intercept the heroes. It was just a non-stop nail biter!


In the end we couldn't believe how close it was. It really was just one or two rolls that totally tipped the game one way or the other. One priority change or arrow shot could have completely changed things. 


In terms of balance, we think the points worked out well, I got a bit under 100 points worth of goblins back as reinforcements and started with 100 points less, so it balanced out there. So much fun!


I can't stress enough how much more exciting this game is if you play scenarios instead of death matches, if you haven't done it yet - what are you waiting for!?!?!