
You start off with half your army near the centre of the table, the other half at the edge.
We also decided to play a different end of game rule.
You play until one side is broken, from then on an escalating chance of game over. A 6 on the turn a side is broken ends the game. A 5 or 6 the turn after that, 4, 5 or 6 the turn after that etc.
My brother chose the points - 600.
Dwarves before the match:
600 points huh. He might choose his Mumak at 600 points, though generally the Mumak works better with a larger supporting army. Who knows! In any case, it's time to let the dwarves have a go. Although their stumpy legs mean that half of the army won't even be in combat until turn 4 or so =(
I've gone with two squads:
Etako's Vault Warden team and Brynmor's rag-tag bunch of tough guys. Each team will have a banner. I plan on putting the Vault Wardens up near the front, even with a Mumak, they should help a lot, with some Khazad Guard to charge in at it. Each team will have 3 Khazad Guard and 3 Iron Guard also. The remaining forces are my other 8 shielded dwarves and a couple of two-handed dwarven warriors.
Harad before the match:
Today’s battle was a fight until break, with increasing chance of game over after a force breaks. At night, arrows had less range, but increased damage. I was tempted to put lots of Harad archers and the Betrayer, so there was twice the chance of poison re-rolls, in addition to greater chance of hitting, but I ended up going for something quite different.
A couple times my brother has mentioned how it would be cool to have a monster battle, and even to throw in a dragon (since I have a toy dragon model that came with the Heroscape game). I decided to try out the dragon today, with fiery breath and toughened hide. It’s not the official model, or on an official sized base, but we’re just playing for fun, so I thought I’d see what it was like.
My plan is to throw the Watchers of Karna and Hasharin, with the Dragon, and try to wipe out as many of his guys as quickly as possible, while my spearmen march up from the back and take on anyone straying from the fight.
The set-up:
Dwarves are known for tunneling ever deeper, ever further, looking for precious stones and, of course, mithril. Deep under the dry, windswept deserts of the South, Etako and Brynmor lead a group of dwarves towards a large cavern, a dullish glow seems to emanate from it and they are intrigued.
Etako leads a group forward, Vault Wardens behind their massive shields, ready for any horde of foul goblins. Brynmor hangs back to cover the tunnel entrance, wary of cave trolls.


The Serpent Horde are not named for the poisonous desert snakes, as many have thought throughout the ages, but for a dragon! The dwarves have mined too closely to the hoard of precious jewels, and the dragon is not happy. When dragons get unhappy, everybody nearby gets unhappy! Plundering the desert kingdoms and ruining their cities, the Great Serpent commands fear and respect from the desert peoples. In the middle of a gift-giving ceremony to appease the beast, the Hasharin finds himself turning to see infidel dwarves in the presence of the Dragon!
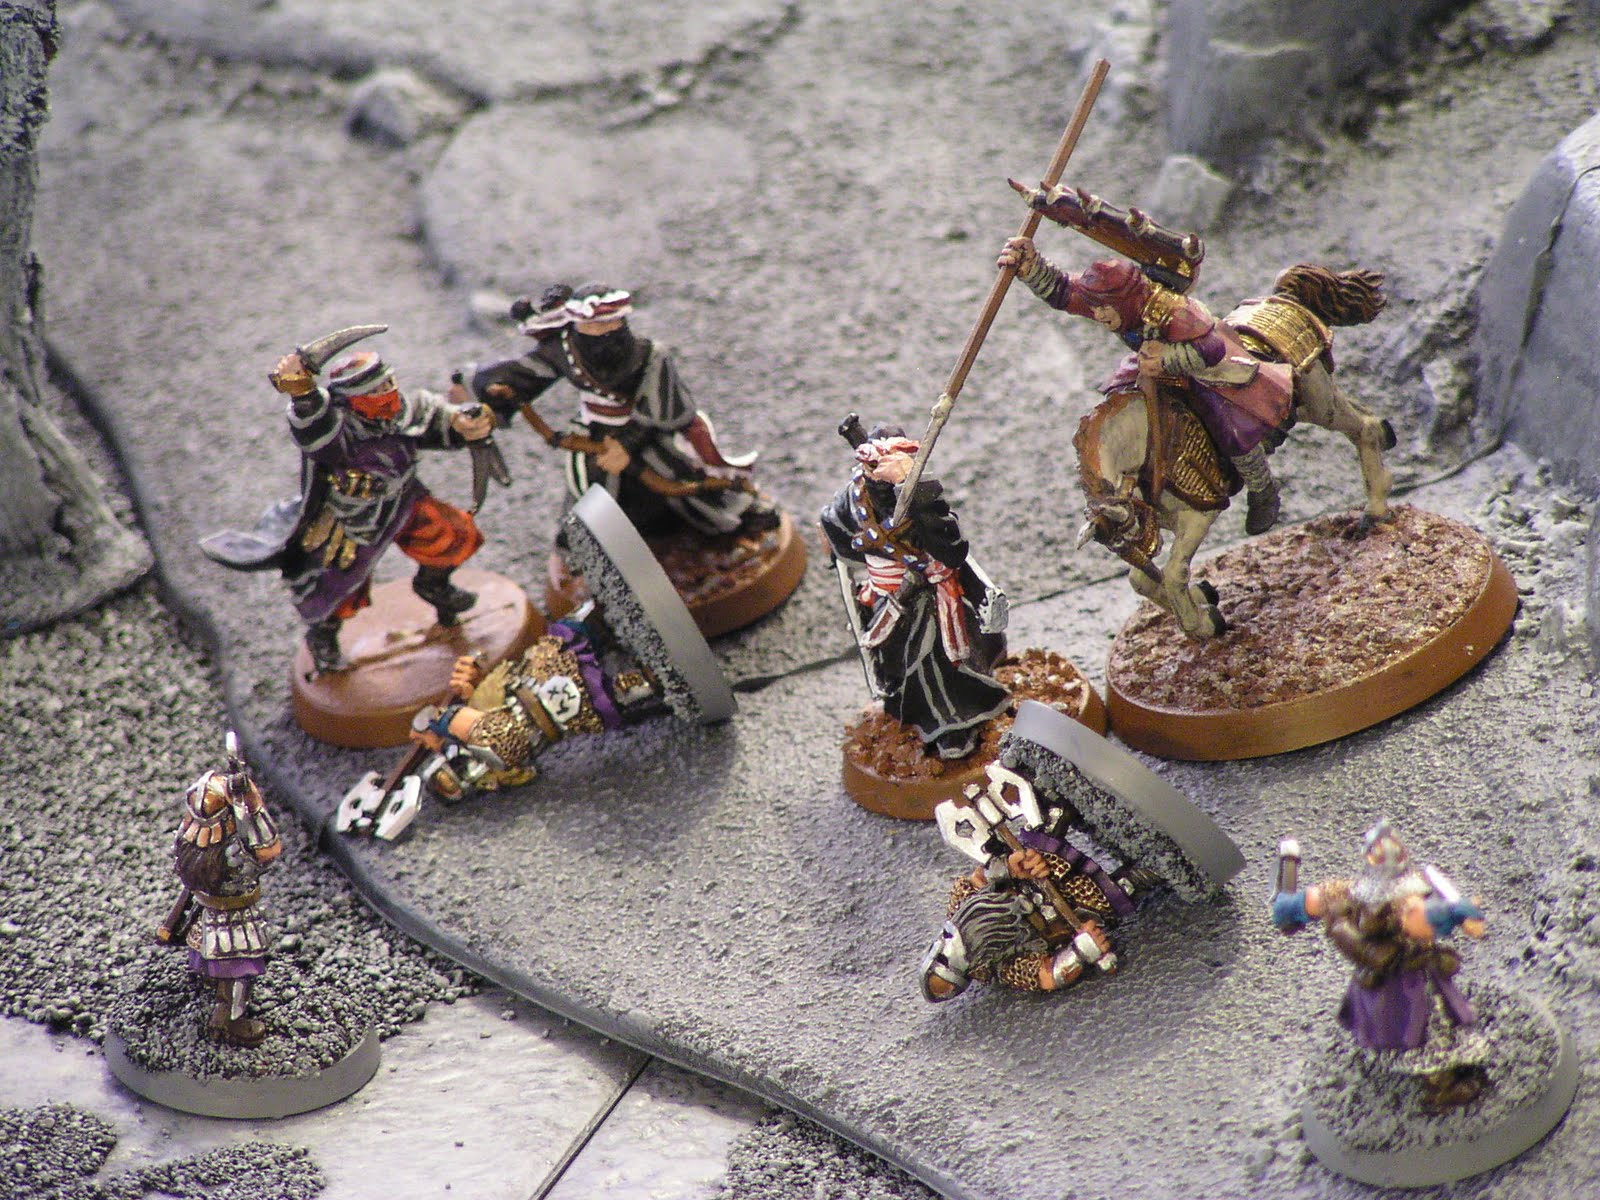
Etako finds himself facing the Hasharin and a bloodthirsty gang of Watchers of Karna, black robes almost invisible in the darkness. With a dragon looming on the nearby hill, his only chance is to charge into the men, hoping that the dragon won't risk burning them with its dangerous firebreath.

Brynmor emerges from the far end of the table and waves his men forward, knowing that it's going to be a long slog, but eager to join the battle.

Turn 1: Priority Harad.
The black-clad men swarm forward, and the dwarves counter-attack, trying to bring as many of their number to bear as they can. The banner-bearer calls out for them to be strong and courageous, a difficult task with the bulk of the dragon visible by the flames of the lava pits.

The two dwarves on the flank are protected by heavy shields, though nothing compared to the Vault shields. The furthest is charged by a Watcher, who is incensed with rage at the desecrating dwarf. The dwarf sets himself solidly and shields, focusing all his skill on blocking the darting blades... in vain. The Watcher twirls and whirls and manages to slide a blade sideways into the neck of the dwarf, slashing through the jugular and silencing him forever.
The Hasharin and another Watcher pounce on another of the flanking dwarves, he too focuses on defence, but there is no defence against the Hasharin and his deadly attacks, numerous puncture wounds blossom blood in the weak points of his armour as the dwarf sinks to the ground, dead before his head hits the cavern floor.
Two Vault Warden teams tackle another watcher, the massive shields box the Watcher in and the dwarves heave mightily to actually pin the evil man between them while the spears thrust into the black fabric, staining it dark red before the shields pull back and allow the corpse to fall to the ground.
Another Vault Warden team presses home the advantage against a spearman, who was in the process of supporting the watcher before the massive shield loomed to his right. Stabbing past the shield at the spear-wielding dwarf, he almost wounds the stocky warrior, but the shield dwarf rests the shield on his shoulder and swings his axe around, taking the Harad warrior in the back of the knee and bringing him to the ground, where the speardwarf can finish him off with a quick thrust to the chest.

On the other side of a large rock pillar, Etako leads his personal bodyguard in an assault of more Watchers. An Iron Guard hurls an axe and then bodyslams into a Watcher, while Etako leaps onto him, pulls back his fist and send the Ironfist Gauntlet smashing into the man's head, sending ***censored for excessive violence*** and causing another human fatality.
A Vault Warden fends off a Watcher of Karna, while a Khazad tries to inflict a wound with a massive swing of his two handed axe. The Watcher laughs heartily, enjoying the sport, and darts back, avoiding the axe with ease.
The Watcher next to him presses home an attack against another Khazad Guard, who loses ground, but obtains no serious injury, every dagger thrust seems to deflect from his well-crafted armour.
Finally, on the far flank two Iron Guards and a Khazad Guard team up against a spearman, who never stood a chance against the three well-trained dwarves. Between the three of them they have well over a century of combat experience and dispatch the human quickly and easily, kicking the body into the nearby lava to remove the barrier to their next target.

Turn 2: Priority Harad.
The Humans, fleeter of foot than the stocky dwarves, retreat! Just as the dwarves are about to charge forward at them in a standard wall formation Etako yells out: "Baruk 'ware the dragon fire!"
For looming on the hill above them is the Serpent of Harad, inhaling with the sound of an approaching wind. The dwarves scatter as much as they are able, given that the Hasharin would love to find them by themselves. The quandary - scatter to avoid dragonfire or stay together to avoid the assassin's blade?

A fireball erupts from the mouth of the great beast and the dwarves in its path throw themselves to the ground. All but the banner bearer, who stands tall and calls them to bravery - before catching the full impact of the firey blaze. He is vaporised almost instantly, charred ash of the standard fluttering to the ground like black snow.
A measure of the fire splashes out into the back of a Vault Warden spearwielder, he is not so fortunate as the banner bearer and dies screaming horribly as the fire eats like acid through the armour on his back and into his body.
Screaming with rage and fury, Vault Warden teams trap Watchers up against the lava and push forward solidly, forcing the black clad men into the molten lake and cursing them loudly as their bodies sink, burning horribly all the while. The Watchers are stoic and die without giving the dwarves the pleasure of hearing their torment - silent to the end, though in terrible pain, burning alive from the feet up.

Turn 3: Priority Dwarves.
Brynmor leads his group ever forward, he can see the other group of Haradrim and calls loudly to them, trying to distract them away from Etako's band. His insults are exceptionally well chosen, but the sound carries all too easily to Serpent ears...

The mighty beast turns atop the hill, sees a close-packed line of dwarves, inhales deeply and sends a burning gout of flame at the dwarven column. Four dwarves are instantly incinerated, much to the horror of Brynmor and followers. The dragon-fear spreads quickly and the Haradrim laugh loudly and evilly at the fallen dwarves.
Still spread out, due to the fear of dragon-fire, the dwarves find that they were, indeed, damned if they did and damned if they didn't. The Hasharin and a watcher leap at a lone dwarf, who, with one watchful eye on the Serpent above, is distracted. He still fends off the first wave of attacks, but the sudden glare of fire and shocked calls from Brynmor's band causes him to flinch enough for the two men to dance past his defence and thrust poisoned daggers through the holes in his mask. The blades penetrate deeply and the dwarf dies quickly. (The Hasharin's ability to re-roll if he doesn't cause a wound is amazing, he uses it multiple times in this battle - ensuring that many noble dwarves die just after thinking they were safe!)
A cavalryman charges full-tilt at another dwarf, the heavy armour a hindrance against the horse as he is kicked to the ground and trampled beneath the hooves of the stallion. A Watcher then darts in and with several deft sword thrusts, ensures that the dwarf will never rise again.
Another cavalryman is brave, but foolhardy, and charges at a line of Wardens. He urges his horse to leap the solid metal obstacle, but at the last second it balks and skids to a halt against the iron and mithril shields. The spears lance forward from behind the wall of metal and bring the man, cursing, to the ground. His swearing fades quickly as blood gurgles in his throat from numerous puncture wounds.

Turn 4 - Priority Haradrim.
Brynmor shouts a command and the well-trained dwarves re-organise from a row into a column, just out of range of the evil dragon's fire breath. The Hasharin backs off from an encroaching wall of shields.

A Watcher and a cavalry man are left behind in the Hasharin's retreat. Three Iron Guards and a Khazad Guard descend on the men, yelling loudly and attacking swiftly. The axes of the dwarves are sharp, and revenge is swift as they attack without flair or style, just quickly and efficiently bringing the human lives to an end.

Turn 5 - Priority Dwarves.
The dwarves press their assault on the Hasharin, surrounding him in a wall of shields. Anybody too far from the combat spreads out as the Dragon looms on the hill again. Etako shouts out to get closer to the enemy, knowing that the great beast won't risk killing the high ranking assassin.

Etako is wrong. The dragon sends another deadly fireball into the midst of the melee. The Vault Warden that it hits is killed instantly, even the mithril-imbued shield is no protection from a direct hit from dragonflame. Etako shields his face with the Ironfist Gauntlet and turns side-on to the blast. His cloak is half disintegrated and his richly embroidered clothes are blackened and burnt, but the mithril armour protects his flesh and his Gauntlet shields his face. (He used all of his might and fate to save the injury!)
The two spearmen are lucky indeed, as the splatters of dragonfire fall around them without causing harm. Another Vault Warden is entirely unfortunate as the flame cascades like liquid fire over his shield, through the narrow eye-slit. He dies screaming as the napalm-like substance eats through his helmet and ***censored due to overload of adjectives about fire***.
The Hasharin, surprised a little, but not entirely by the Serpent's tactics, concentrates all his skills and dodges the droplets of fire splashing off the hapless dwarves as though they were moving in slow motion. He bends, sways and then turns his momentum into an attack against the remaining standing dwarf. The dwarf's shield was raised against the dragon fire and although he feels the heat from it, he survives, only to be forced back by the blows of the Hasharin. Luck is with him as the pools of dragonfire, now cooling on the ground, stop the Hasharin from attacking with full force.

Behind the Hasharin, and back-lit by the inferno consuming the luckless dwarves, a Watcher takes his opportunity and glides past a massive shield, pirouetting past the huge spear and striking swiftly in the back of the Warden's neck, taking out another of the massive shielded warriors this turn.
On Brynmor's side the tide of battle continues raging against the stocky dwarves. Forced into an awkward position due to the worry over dragonbreath, several of the dwarves have been attacked. Indomitable behind their shields, they don't stress too much. Their overconfidence is their ruination.
Also their rolling of more 1s than even Boromir could lay claim to! The dwarves all fell back, shields raised to protect themselves from the flurry of spear attacks. One dwarf manages to keep his feet, three fall to the Serpent Horde's spears. Brynmor, incensed and furious, waves his dwarves forward to avenge their deaths.

Turn 6 - Priority Harad.
The Serpent, growing tired of roasting dwarves at a distance, charges forward towards the one lone Khazad Guard that defends the flank of Etako's diminished force. Axe raised, the dwarf turns to meet the attack.

Although he falls to the Dragon, a day or two from now the Dragon suffers horrible indigestion from swallowing so much metal. Not the best way to get even, sure, but better than nothing.
Etako leads his remaining troops forward, attacking the Hasharin with fury. Although they use all of the fate, might and sheer determination they have left, in the end the Hasharin falls to dwarven skill. The Ironfist Gauntlet actually knocks the Hasharin back hard enough that he leaves the ground and his black, lifeless body lands head first some distance away.
The last Watcher takes on the last Vault Warden team and another speardwarf, the fighting is furious, the shield trying to diminish the mobility of the black-clad, dual wielding human. In the end, though, the darkness of the cavern benefits the man who finds his cloak snagged on a spear and pinned to the shield! Slipping silently down, however, he shrugs off the garment and lunges underneath the spear, skewering the speardwarf in the lungs and sending him gurgling to the ground.

Brynmor, enraged beyond care by the fatalities of the previous combat, calls a heroic fight and leads a comrade with him into battle, Gjel-grava slamming aside spearthrusts and caving in Haradrim skulls.

The dwarves around him, emboldened by their leader, leap into the fray. Two of the overwhelmed dwarves shield themselves, the Iron Guard and Khazad Guard attack furiously. In the end six spearmen fall beneath the assault, the Haradrim are broken.

Do they retreat? The die is rolled... a 2! The battle rages on...
Turn 7 - Priority Haradrim
Two of the spearmen run from Brynmor's onslaught, those that remain soon wish that they had followed their cowardly comrades. The dwarves show no mercy, overwhelming the last few humans. The Iron Guard viciously attack, hand axes and swords flashing, the Khazad Guard swing their two handers in mighty arcs, ending in bright blood-red sprays. Brynmor's shovel staves in the skull of his opponent and he looks around at the corpses of man and dwarf, blood mingling on the ground.

Etako bravely holds the line against the dragon. It almost decided to leave the battle, but was still hungry for dwarf-flesh. (Failed courage, but used last might to stay in the fight.) The nearby Watcher took the opportunity to disappear into the shadows.
Teeth, claw and tail flashing in the red glow of the lava pits, the dragon knocks all the dwarves back and slays two Iron Guard as easily as though they were unarmoured humans. The dwarven force is now broken.

The die is cast... it's a 5! The game is over!
The dragon leaves the battlefield. Is it because it's hunger has been sated? Or is it the grim look of the Iron Guard's steely mask? Or something about the positioning of the speardwarf behind it? Only it knows... but it will be back when hungry for more!

Minor Victory for the Dwarves!
Post game Harad:
The dragon was fun! I’m glad I was the ‘evil’ team today, because the dragon could breathe fire on people, even if my own forces would get swept up in the attack, so I was able to attack when dwarves were bunched together. My favourite scene was when the Dragon, atop the hill, was looking down with gaping jaw on a lone dwarf.
Post game Dwarves:
Well, there you have it, last week I surprised my brother with a Balrog, this week he turned the tables and surprised me with a dragon! We decided that the Serpent Horde was named for a dragon instead of whatever the actual reason is =)
What a great game! So close from turn to turn. I'd lose a ton of dwarves, but then the next turn he'd lose a ton of men, back and forth! My favorite moment was the dragon breathing fire on it's own troops to try and get rid of the last Vault Wardens - classic evil!
My man of the match goes to the Watcher of Karna that not only killed multiple dwarves (including a Vault Warden!) but then he just melted into the darkness - I'm sure we'll meet him again!
Another rip-snorting awesomely fun game. Even better, I just got some more cheap Khazad Guard in the mail (e-Bay thank you very much!) so will soon have a 1000 point Dwarf army. I don't know why it's important, but 1000 points is a nice milestone =)
Anyway, as mentioned in the forum posts, I kept an eye on the clock today, the game took about 2 hours, including a spot of lunch in there and all the photography. So I definitely confirm that playing a scenario instead of a "to the death" allows for both a quicker game AND (in my opinion) a more fun one =)
Victory pose - diminished but still raring to go:

Thanks for reading!


