Showing posts with label scenery. Show all posts

Tuesday, February 19, 2019

The Shire

It's been a while!

Christmas has come and gone, as have the holidays! Over the holiday season I got up to a few projects and today one of them is finally finished!


It's taken me ages to do, but mostly because of time restrictions, I'm sure some of you out there could knock this up pretty quickly!

Over the Christmas period I received the following...

My son really likes the idea of hobbits, so we went all in on enough for a battle company of hobbits!

Of course, they'll need painting and somewhere to live so we are working on some dwellings and what better place to start than an actual hobbit hole =)

I started with some cheap packing styrofoam and put it on an old cork tile.


From above you can see that I've sort of put it in tiers so that it can be climbed up (sort of) in hindsight I probably should have smoothed it right down, but it's awkward working with this polystyrene. I've seen people use the nicer sort but I don't have any of that.


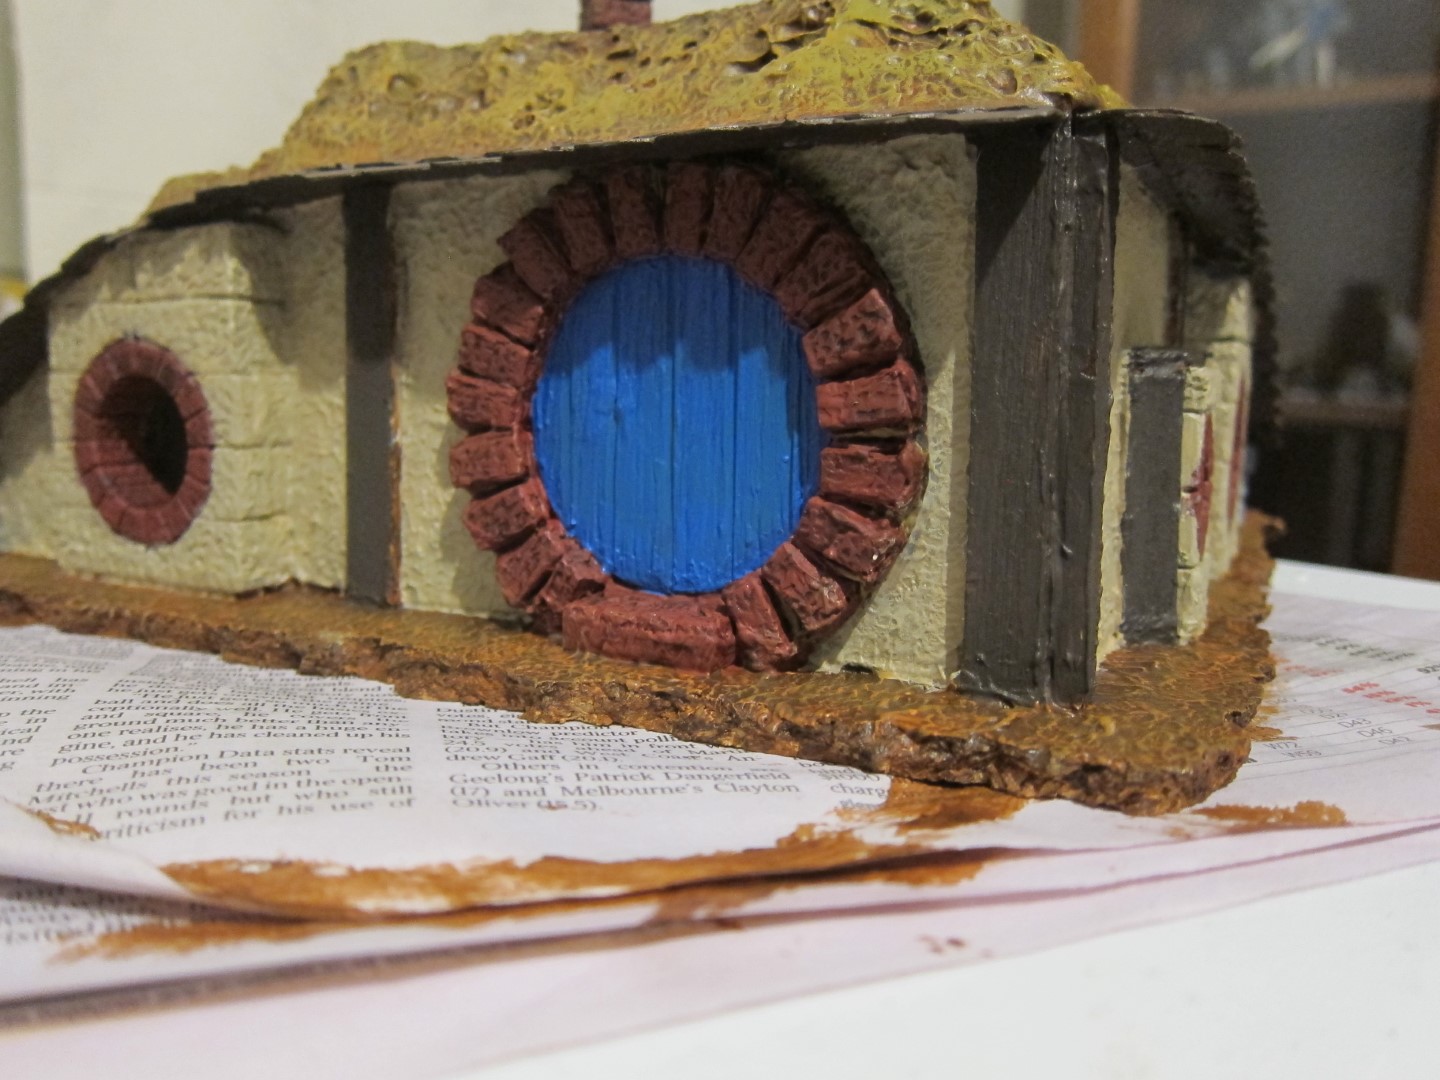
I used a bit of green stuff on a round plastic base and used a ruler to score "planks" and a piece of wood from the garden to imprint it with wood grain.


I had some Hirst Arts blocks left over from other stuff that worked nicely for round doors and windows. I used poly filler to stick it down on some cardboard cut to fit the flat sides of the hill.


So you can see it sort of standing up here.


On youtube I saw people making roofs out of cardboard strips cut out, so I thought I'd give that a go for my other Hirst Arts project (more on that later) and to provide a sort of overhang on the hill.


Next I used some roofing gap filler to squirt all over the whole thing and then used a rolled and scrunched up piece of alumnium foil to texture it.


You can see the tiled bit stuck on here, I put a few bits of balsa around some of the features both for a bit of colour and texture but also to help glue on the roofing tile bits!


And here's the other side. Oh, you can see I also used some of the filler on the cardboard walls to give them a bit of texture as I sort of wanted a stucco look.


With some cheap craft glue from Bunnings I slopped brown all over the dirt and wood.


Next I used a sort of reddish brown on the bricks and Karak Stone on the walls.


I tried a bit of drybrushing on the dirt, but it was a horrible yellowy colour when it dried! Ewww! I also used some Dryad Bark on the wood and tiles.


We decided on a bright blue door. The bricks were washed with Agrax Earthshade then re-drybrushed with some of my old Scab Red paint. The stucco was drybrushed with Ushabti Bone and a little Tyrant Skull. The wood got a bit of Baneblade Brown.


I splashed out at got a canister of flocking! As you all know I've only ever done grey and black rock and gravel before, so this was all very new to me! 


My brother 3-D printed a lamp-post for me! I also used a pin with a round head to use as a door handle and made a knocker our of a small round link from a jewellry kit. Oh, and at the op-shop I saw an old basket that I cut up to use as fences.


It's looking nice and green now!


For some extra decorations I thought I'd try and make some little flower boxes. It's a little block of balsa wood with tiny nails hammered into it.


Paint the top of the nails in colours and the rest brown with a bit of the flocking and voila - flower box!


And when you put it all together you have a hobbit hole!
I'm really pleased with how it came up and for my birthday I've requested a green table mat so that the hobbit hole doesn't have to sit in the ash wastes of mordor or in the underground mines of moria!


I'll try to share how my other houses are going and, of course, the hobbits themselves, over the next while =)

Wednesday, September 19, 2018

Painting Ruins of Osgiliath

Someone keen-eyed noticed I had some new ruins in among my older scenery. My parents got me the Games Workshop Ruins of Osgiliath kit some time back and I thought I'd put it together and paint it to show my son how different scenery painting is from the very intricate miniature painting!

It actually featured dramatically in our most recent game (which I haven't posted about yet, but here's a sneak preview...


Obviously first we had to glue it together. My son got the pieces out and worked out where they should all go, then let me do the actual gluing.


I used the same technique that I've used in previous scenery, which is first a brown undercoat...


Followed by a dark grey...


Then it's some lighter grey drybrushing (pretty heavily)...


Finally a black wash and a lighter drybrush on the corners.


Here's the main gate section with some dwarves for scale...


And the arch section...


Finally the stairs bit with an archer behind the half-height wall. 


Pretty neat stuff I gotta say. I didn't spend much time on it and certainly wasn't very careful and yet it turned out looking really great. I particularly liked the statues =)

Wednesday, September 18, 2013

Ruins on full realm of battle board with 40k and Mumak

As promised, here are some shots on the full board with Mumak and some 40k Space Wolves for scale. Unfortunately it was getting dark outside and our light bulbs, though they've saved us lots of money, are too dim for good photos!

Here are my currently painted Space Wolves.


Here is a close-up of some Haradrim clambering up the back slopes...


And here are some coming up the front steps.


The Space Wolves can get up the steps easily too...


Even a Wolf Lord wants to party up the top...


And there's the Mumak for comparison. To get the height I wanted I put it next to the polystyrene and stacked it up so that the howdah would be level with the top of it. I figure the Harad can leap onto the ruins, and certainly shoot without pesky height differences!


Here's a shot from the other side so you can see how big the Mumak is!


And from the back...


And from as above as I could get standing on a chair over the table (glad I didn't drop the camera!)


Obviously the two tiles don't need to be next to one another and can be used separately or just moved apart from one another. I'm thinking of building a little bridge that can be used to connect the two with a gap between them wide enough to ride a horse (or run a warg) down.

Sunday, September 15, 2013

It's still not Weathertop, but it is finally painted!

Well, sorry for the extended delay, life has been full to the brim of trips, uni, a small child, illness and Borderlands with friends.

On the plus side, I've finally finished my scenery =)

I'll take some shots of it on the full board with more minis at a later date, but am currently working on an assignment worth 40% of my final grade, so can't take too much time out for blogging!

These are, again, Hirst Arts blocks. The ruined tower set that lets you make Weathertop from The Lord of the Rings. I decided early on that I wanted to play with some more verticality, but also wanted to easily use boards that were one foot by one foot and a little modular. Here you can see that I've sorted the blocks out by type and have started dry-assembly on the paper plan provided on the Hirst Arts website. http://www.hirstarts.com/


Here's a little closer look. You can also see the instructions in the back right, though I didn't use them for everything as I did a slightly different version.


These aren't glued yet, just an idea of what I had for the first play with the blocks...


Now I've glued some of the sections together, but have yet to work out anything about hills etc. As a matter of fact, on the left you can see my sections for the ruined castle that are in the process of painting - I was putting this one together while waiting for paint to dry on the other =)


After a day of hacking up polystyrene sheets I had an idea for a more spread out series of ruins. I have covered the polystyrene with polyfilla (actually, not the "official" one, but a cheaper version I found at Bunnings. I just squeezed it out, spread it all over the polystyrene with my finger then used some wet crumpled aluminium foil and dabbed it all over the still wet polyfilla. This gave it a bumpy texture that was quite irregular. On top of all that I globbed glue, then sand, then some little rocks. I've also tried to add some more broken bits around the place.


Here it is all painted black. The weather (winter here) was so awful that I actually painted it with watered down black paint as I couldn't get a day that wasn't too wet or cold for the spray paint. You may be able to see that the tops of some of the blocks that were smooth were given a layer of polyfilla roughed up to try and give them a non-smooth texture. 


Now I've also painted the ruins brown.


Then drybrushed blue-grey.


And then drybrushed dark grey over everything, light grey over everything then a final drybrush of games workshop white drybrush (can't remember the name off the top of my head) just on the ruins.


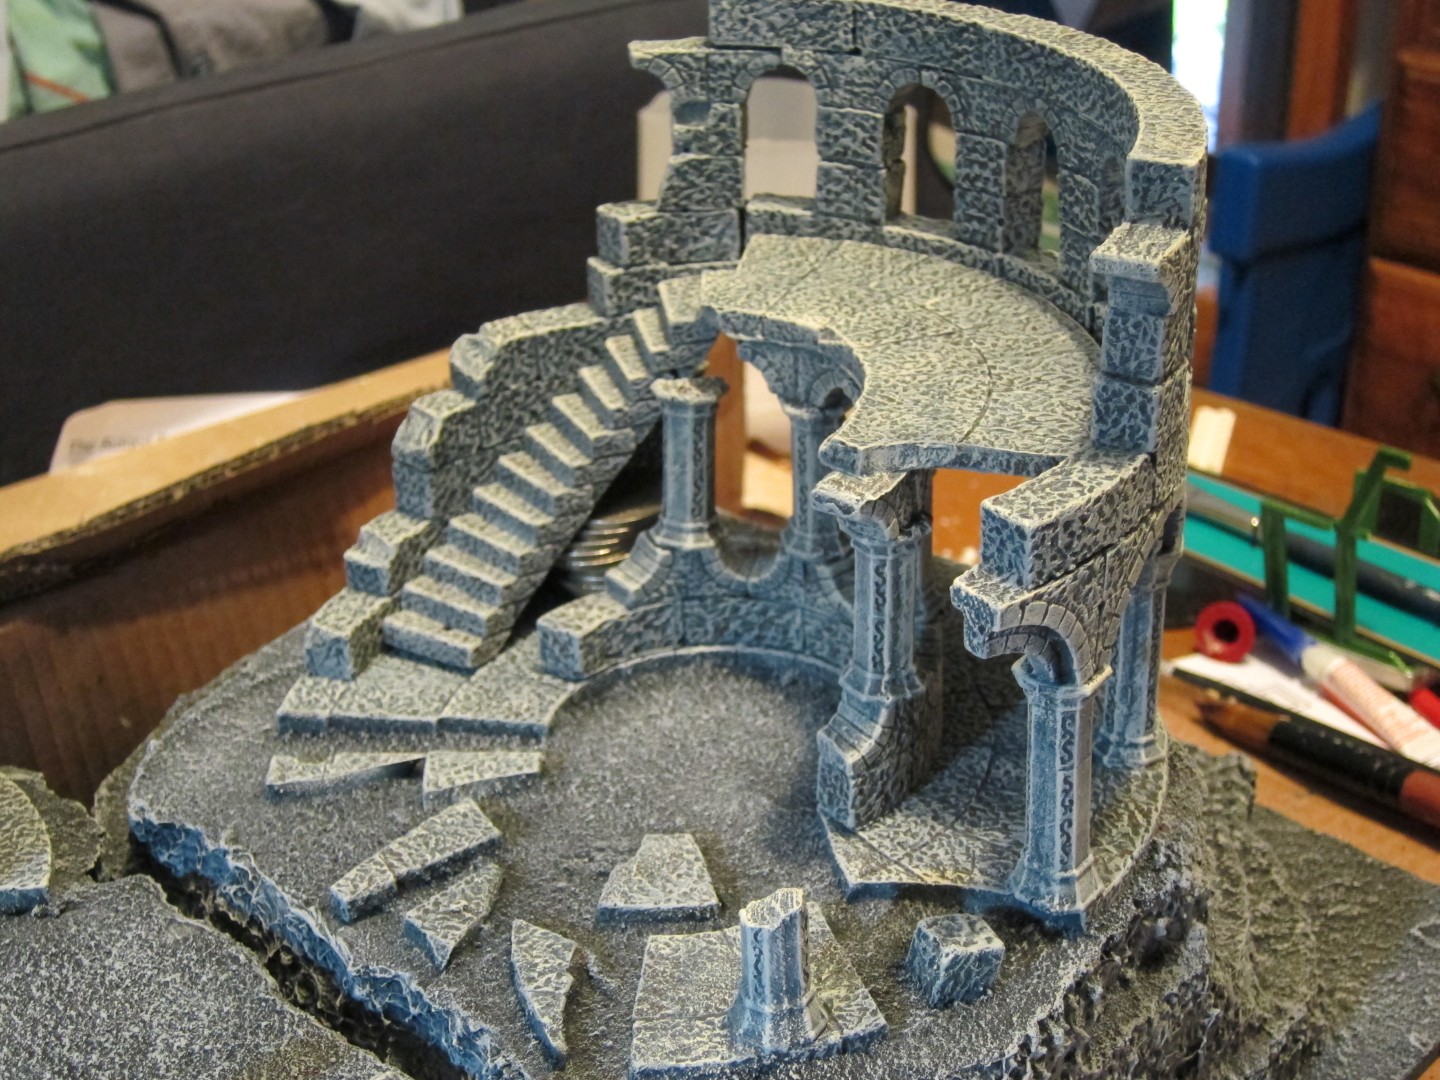
The photo doesn't quite capture the subtle difference in tones between the ruins and the rocks. I was sort of going for a look as though the big stone "steps" were carved into the cliff face and are not natural, though have weathered etc to look as though they're almost part of the rest of the scenery.


The coins hiding under the stairs are to hold it while the glue sets! And the gap under the bottom step is soon to be greenstuff filled and re-painted. My stairs were a little too steep. I'm quite pleased with how rough the previously smooth bits ended up once dry-brushed.


For scale, here's the small front ruin with an archer...


And the small top ruin...


And the main ruined section...


Here it is on a 2 foot by 2 foot board. Because each section is 1 foot by 1 foot you can put them next to each other, but you don't have to.


Side view of the top section...


It's hard to capture how tall they are off the ground here. I'll set up the boards later to demonstrate how I chose the height by putting a Mumak next to it =)


There is access to the top level via the front steps, but also around the back there is a semi-winding path that a smaller based mini could ascend.


And lastly a sort of top-ish view. 


I was pretty happy with how cheaply the polyfilla roughed up the styrofoam edges. I was watching Thomas the Tank Engine with my son the other day (he's 2 1/2 now) and noticed that lots of their scenery (in the old model-based episodes, not the new CG ones) has the tell-tale bubbles of polystyrene. I've managed to avoid that by spending about $2 on a cheap polyfilla knock-off, my fingers and some aluminium foil (which I re-used after cooking a roast and rinsing it off).

I think I preferred the other blocks from the ruined castle, but I know lots of people prefer these styled ones, so I guess it's just personal taste. 

So there you have it, sorry for how long it's been, I'd really like to do more painting and hobby, but just don't have lots of time spare for it currently.

Next chance I get (pre-schooler free) I'll try to set up the boards with the new scenery pieces on them so you can get a better sense of scale.